
Have you ever looked at one of your old blog posts and thought, This could use some work? Maybe it’s not bringing in the traffic it used to, or it’s just not as polished as your newer content. That’s where rewriting comes in – and it’s one of the best ways to breathe new life into your blog.
Here’s the big question:
How is rewriting a post different from writing a new blog post from scratch?
Well, the truth is that rewriting a post isn’t just about updating the facts. You’ll find outdated info to modernize, but there’s another angle. It’s about revisiting your post with SEO in mind, focusing on target keywords, search intent, and structure in a way you might not have when you first wrote it.
Why should you do an SEO rewrite for your old blog posts?
Outdated posts can be annoying, especially when they reflect an opinion you’ve changed your mind about.
Maybe you recommended something you wouldn’t now, or you don’t even follow the steps you once taught in a tutorial.
But fixing those parts isn’t just about content editing.
Refreshing old blog posts can help them show up better in search results. Bloggers who update their content more often tend to see better results from it.
Doing regular content checks helps you spot which posts need a content refresh and figure out what to work on first. Keeping the same URL keeps the page’s authority intact. Making your posts easier to read and better formatted also keeps people around longer.

Rewriting old blog posts isn’t just a way to save time, it’s actually one of the easiest ways to get better results from your blog. If you’re wondering why it’s worth doing, here are a few simple reasons:
- Improve your freshness score: When you republish a post on your blog, search engines see the new date and give it a higher ranking just for being more recent. This ranking factor is commonly referred to as the freshness score. Refreshing outdated content helps retain existing backlinks and acquire new ones.
- Improve reliability and helpfulness: With Google’s new Helpful content update, having reliable articles is more important than ever. You need to let the search engine know that your content is worth ranking on the top pages.
- Optimize your search snippet: Published posts with up to date information have way more keyword data available, and you can use this data to write a new search featured snippet (SEO title and description) that will get you more clicks.
- Optimize for more longtail target keywords: You’ll find dozens of new target keywords to include in your existing content, which will boost the longtail search traffic you get in search results. Updating the content, refining headings, and improving keyword placement gives search engines more reasons to prioritize your post.
- Improve readability and structure: Writing styles evolve, and what worked back then might feel clunky now. Rewriting old and outdated content gives you the chance to simplify your language, add more engaging headlines, and break up long paragraphs for better readability.
- Increase internal linking opportunities: Old blog posts often lack the connections newer ones have. When rewriting, you can add internal and external links to newer posts on your blog, fix broken links, keeping readers engaged and improving your site’s SEO structure.
In short, rewriting isn’t just a quick refresh, it’s a way to amplify your content’s value and keep it working for you long after it’s published with up to date information.
Now that you know how important rewriting blog posts is for SEO, let’s get started with the process.
7 steps process on how to rewrite website content for search engines
1. Identify old blog posts that need SEO rewrite
Start by reviewing your analytics to find posts with declining organic traffic or low rankings. Prioritize those that target high-value keywords or have the potential to attract more readers with updates.
Use tools like Google Analytics or your WordPress plugin’s analytics dashboard to identify posts with declining traffic or low engagement. Pay attention to old blog posts with traffic that has dropped over time. These might have outdated content or aren’t ranking as high as they used to.
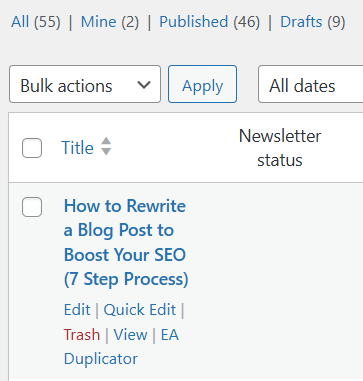
Updating old blog posts on WordPress is straightforward. Go to All Posts in your WordPress dashboard and search for the post you want to update. Click on Edit to open the post editor. From there, update the blog content with fresh, high-quality up to date information and any necessary improvements.
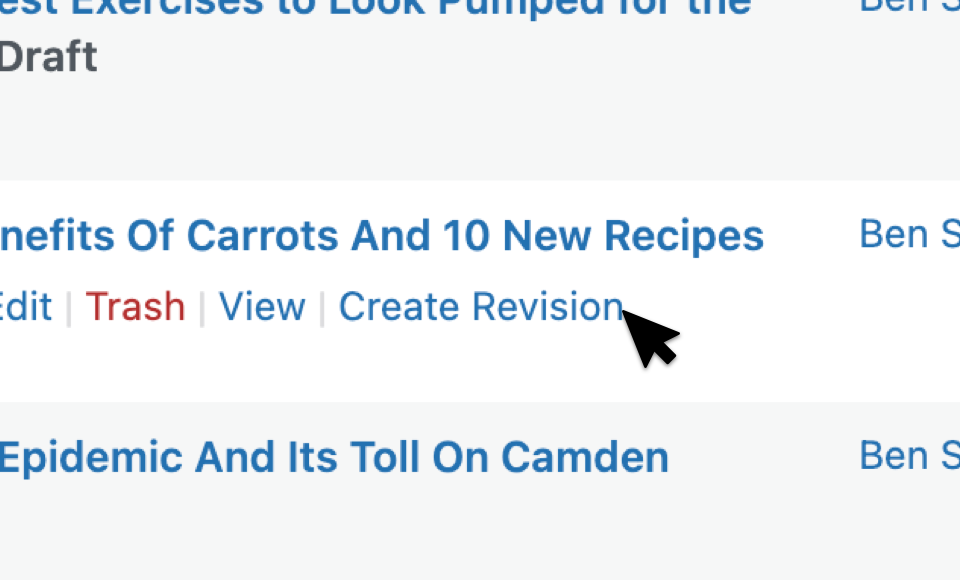
However, republishing old WordPress posts with revision can be simple if you use Strive.
With Strive, you can simply click the “Create Revision” link under any published post. It will create an exact replica for you to work on privately until you’re ready to publish.
You can schedule the revision like a normal post, and it will override the original when it goes live. Plus, you can even see it in your content calendar alongside your other posts.

You can see your mix of updating old posts and writing new posts
Once you’ve got your revision created, you’re ready to dive into the keyword research.
Tip: If your team lacks the bandwidth to run regular content audits, especially in a growing SaaS company, partnering with a SaaS content marketing agency can help. They bring the expertise to spot high-impact opportunities faster and turn them into traffic-boosting assets through strategic rewrites and SEO optimization.
2. Find keywords with Google Search Console
When doing keyword research, you have to do a lot of digging and guessing about what people are searching for. When updating an old blog post for SEO, it’s completely different.
Instead of searching for new keywords, you can see which keywords your target audience is already using to find your post after it was originally published.
And this is easy to do with Google Search Console.
How to use Google Search Console
Search Console is totally free to use and only takes a moment to set up.

If you haven’t used Search Console before, all you have to do is enter your domain and verify your ownership.

It should only take a minute or two.
You can add a sitemap, check for errors and find relevant keywords that can improve SEO performance with Search Console, but we’re just going to look at the keyword research tools only.
To find the keyword data for your blog article, click on the Performance menu item in the sidebar.

If you previously set up Search Console, the menu item may be called “Search results” instead
You’ll see a chart displaying your site’s search traffic and performance over the past 90 days. The next step is to filter this keyword data for only the post you’re rewriting.
In the filters section, click on the NEW link to add a new filter.

Select the Page… option to add a new page filter.

In the popup, paste in the URL of your post and click Apply.

You can enter URL patterns too, but we only need an exact URL match for our purposes
The report will update to only display the metrics and keywords found for the URL you entered.
The last step is to enable the Average CTR and Average Position by clicking their checkboxes.

Now, if you scroll past the chart, you’ll see a big keyword table that looks like this:

What you’re looking at is a list of every primary keyword that your post ranked in the top 100 results for.
Pretty incredible, right?
Instead of conducting new keyword research, you have dozens, if not hundreds, listed right here. Even better, these are keywords that most SEO tools won’t find on their own.
I’m sure you’re getting some ideas already, but the data is honestly overwhelming. Where do you even start with all of this?
Well, there are a lot of ways to use this data, but I’m going to give you a very focused two-step process to get more traffic from this data.
The first step is to rewrite your search snippet.
Tip: Search Console is going to show you the last 3 month’s worth of data, but you can expand/reduce the timeframe.
3. Rewrite your SEO snippet for more clicks
This is a search snippet:

Snippets can include a few different elements, but there are three parts that are always present:
- URL
- Title
- Description
The URL is already decided, so that means you have the title and description at your disposal.
Now think about this…
If someone doesn’t recognize your site, they’re going to click on your post based 100% on the title and description.
In other words, if you rewrite your snippet to appeal better to searchers, more of them will click.
So, how do you rewrite your snippet to get more clicks for higher ranking posts?
You analyze your over-performing and under-performing irrelevant keywords.
In the keyword table, click on the Position label twice to sort by your highest-ranking to lowest-ranking keywords.

Since the keywords are sorted by position, the ones at the top should have the highest CTR and it should steadily decline from there.
CTR stands for “Click-through rate” and it’s a percentage of how many people clicked on your site out of the number of people who saw it (impression).
What you’re looking for are keywords that have a much higher or lower CTR than the others around them.
Here’s what the average CTR should look like by position:
- #1: 30-60% CTR
- #2: 20-30% CTR
- #3: 10-20% CTR
- #4-10: 1-10% CTR
When a keyword has a high CTR for its position, it means your snippet is appealing to searchers. When it’s low, it means searchers don’t expect to find what they’re looking for on your site.
By looking at both, you can get a much clearer understanding of what people want and use this info to rewrite your snippet for the updated post.
A quick example
Let’s say you wrote an article called, “How to Crate Train a Puppy.” In the keyword table, you find that people who search for crate training with the term “dog” or “adult dog” don’t often click on your article.
How to write a title that covers both keywords? You could easily adapt the article to make it work for both dogs and puppies, so you update your SEO title to “How to Crate Train Puppies & Adult Dogs.”
Now this audience of searchers who have adult dogs will be much more likely to click on your result, leading to more search engine traffic to your original blog post.
Changes like this are so easy to make and can have a huge impact on your traffic with successful articles.
Now let’s look at how you can update your search snippets in WordPress.
Here’s how to edit your SEO snippet
To edit your post’s SEO snippet, you can use either Yoast SEO or RankMath. I’ll demonstrate here using the RankMath plugin.
Once you’ve installed the plugin, visit the post in the editor, and you’ll see a new sidebar icon up top.
Click on it to open the RankMath sidebar.
Inside, you’ll find a few SEO tools, but what you’re looking for is the Search Preview, which shows up at the top.
Click that “Edit Snippet” button to reveal the snippet editor.
Inside the snippet editor, you can enter a new title and description, and RankMath will show you how it will look in Google.
RankMath also includes variables that will automatically output text like your post title or site title. You can use them if you’d like, but it’s fine to write plain text and not use them.
Once you’ve optimized your title tag and meta description, the next step is to find additional keywords to include in your post.
Quick tip: Google will use the title you enter, but will often generate its own description. While your description will be used sometimes, don’t be alarmed if you see something else entirely.
Now that you’ve optimized your search snippet, there’s one more thing to do with the keywords found in Search Console.
4. Make a list of new keywords to target
The next step is keyword research update for your old post. You need to create a list of all the keywords you’re going to target with your post to improve your search rankings.
Start from the top of the keyword table and write down every unique keyword you find. You can skip keywords that are extremely similar to ones you’ve already targeted and those that are irrelevant.
You can create a keyword table in the post editor to track all the keywords you want to target.
Using the screenshot below as an example, most of the keywords are some variation of “WordPress content calendar” or “WordPress editorial calendar,” but I would also add “WordPress schedule plugin” to my list since it’s a bit different.
Hold onto this list for now. You’re going to re-optimize your post with these keywords at the very end.
Before implementing the keywords, let’s talk about how to tackle the actual writing part of the rewrite.
5. Re-outline your post with headings
After reviewing all those keywords, you should have a broader and clearer insight into what your market is looking for.
That’s why the next step is to rewrite your article’s headings.
In the WordPress editor, you can click on the Details button at the top to find a list of your headings.

Based on what you’ve learned from the keywords, how well do your headings match with what people are searching for?
Take a few minutes to reword and rearrange your headings, and write new headings for sections you need to add.
The beauty of this approach is that you’re rewriting based on keyword research, so you’re writing for what your audience wants and what Google wants at the same time.
This is a big step, but once you’ve reorganized the article, you’re ready to do the actual writing part of the rewrite.
6. Rewrite the post (3 tips)

So far, I’ve been giving you high-level steps for how to rewrite website content.
Now it’s time to edit the text and write the new sections. This is a creative process, so whether you write the fresh content or edit the old stuff first is totally up to you.
Instead of telling you how to write content for a website, I’ve included a few tips here to guide you through the process.
Update all forms of outdated info
In addition to editing the text for outdated facts and statements in your new content, don’t forget to update the following elements as well:
- Outdated links to old resources and other websites
- Old social media embeds
- Outdated images/screenshots
- Updating article title tags
You’ll be concentrated on your words, so it’s easy to miss a Twitter embed from 2018, which will stand out to your readers.
Rewrite your intro.
Don’t skip rewriting the introduction. You may have to update it to make it relevant to the new text, but it’s a good idea to try and improve it anyway. Writing effective intros is hard, but it pays off when you get it right.
Add more visual elements
Visual elements are critical when writing for the web. Including visuals in updated blog posts enhances engagement and improves SEO opportunities.
That said, adding them is a lot of work. If you find your post has a lot of plain text and not enough eye-catching images, try adding more images. It provides a better experience for the reader and existing customers.
7. Add your new keywords
Writing is hard enough without trying to include specific words and phrases, so that’s why I recommend waiting until after the rewrite to include the new keywords in your existing pages.
The process for optimizing your original post with keywords is simple.
Start from the top of your keyword list and check if you’ve included the keyword in your post already. If not, find a good place to add it.
Work your way down the list and include every keyword in the post at least once.
Since you’ve already reorganized your article and written it based on these keywords, they should fit it easily. If you find a keyword that’s really awkward to fit into the post, don’t force it. You can modify it a bit or just skip it altogether.
The most important thing is that each keyword appears somewhere in the post. In addition to including keywords in your paragraphs, you can also add them to:
- Headings
- Image alt text
- Image captions
Your old content ranked for these keywords and it didn’t even include them. Now that it contains an exact match, it’s going to rank much better them to bring blog traffic and other related keywords.
Content Refresh vs Full Rewrite: What’s the Difference?
A content refresh and a full rewrite are both strategies to improve old blog posts, but they differ in scope and depth of change.

Content Refresh
A content refresh involves updating and optimizing an existing blog post without making major changes to the core structure or message. This is the ideal approach when the original post is still valuable, but needs minor updates to remain relevant and accurate.
It typically includes:
- Updating outdated statistics, facts, or links.
- Adding new information or examples that are relevant.
- Improving readability by reformatting paragraphs or adding headings.
- Adding or optimizing images.
- Ensuring SEO optimization is current, including keyword adjustments.
Full Rewrite
A full rewrite involves a more comprehensive overhaul of a blog post, sometimes changing the topic or structure entirely. A full rewrite is needed when the original content is outdated, poorly written, or no longer aligns with your blog’s current direction or audience interests.
It typically includes:
- Rewriting large sections of the content to reflect a fresh perspective or updated knowledge.
- Revising the overall tone, structure, or length to match current content standards or SEO strategies.
- Removing irrelevant sections or outdated details and replacing them with new, more engaging material.
- Reworking headings, subheadings, and even keywords to align with new search trends.
Which should you choose?
Opt for a content refresh if the post still provides value, but needs some updates or tweaks.
Go for a full rewrite when the content no longer serves your SEO or audience needs and requires more significant changes.
Final thoughts
Rewriting your existing content for SEO isn’t just a maintenance task, it’s an opportunity to improve your blog’s performance and keep your content relevant on search engines. By following the seven steps outlined in this guide, you can turn your outdated blog posts into high-performing assets that attract more traffic and engage readers.
While it may sound like a lot of work, it’s still way easier than thinking about your next blog post idea and writing it from scratch. And if you consider how much your search traffic increases, it provides a way better ROI than writing a new post, too.
Since you’ve reached the end of this article, your next step should be to open up your WordPress dashboard, revisit those forgotten posts, and give them the attention they deserve.
Once you’re finished, you can schedule your revision for an upcoming publishing date. You can schedule revisions just like normal posts if you take advantage of Strive’s revision feature.
Wait? You’re still not using Strive? Make your content planning easy. Start your 14 day free trial today.
FAQs on how to rewrite old blog post seo
How often should I update my blog posts for SEO?
There’s no strict rule, but a good practice is to review your old content every 6–12 months. Prioritize posts with declining traffic, outdated information, or content that no longer aligns with current trends and SEO best practices.
Is it better to rewrite an old post or write a new one?
It depends on the situation. If the old post has good backlinks, historical value, or existing rankings, rewriting is often more effective. For entirely new topics or different angles, creating a new post might be the better choice.
Should I keep the same URL when updating a blog post?
Yes, keeping the same URL is ideal. It preserves the post’s existing backlinks and authority, which helps maintain its SEO value. If you must change the URL, set up a 301 redirect to avoid losing traffic or rankings.
What tools can I use to help with rewriting old content?
Popular tools like Search Console, Ahrefs, SEMrush, and WordPress plugins like Yoast SEO or RankMath can help you analyze performance, find keywords, and optimize your old content. Tools like Strive Calendar can help you manage your content planning easily.
Can rewriting blog posts really boost traffic?
Absolutely! By updating old content, optimizing for new keywords, and improving readability, you can improve search rankings, increase click-through rates, and attract more organic traffic.
What’s the best way to optimize images in updated blog posts?
Make sure all images have descriptive alt text, proper file names, and compressed file sizes for faster loading. You can also use new, high-quality visuals to make the post more engaging and improve SEO.
How important is internal linking when rewriting old blog posts?
Internal linking is crucial for SEO. It helps search engines understand your site’s structure and keeps readers engaged by directing them to related content. When rewriting a post, add links to newer articles on your blog and update or fix any broken links to maintain a smooth user experience. If it’s applicable, update your external links as well.
How long does it take to see results from updating a blog post?
Results vary depending on the extent of updates and your site’s authority. You might notice improvements in rankings and traffic within a few weeks, but for competitive keywords, it can take a few months.