
Showing the post categories can make planning your content much easier.
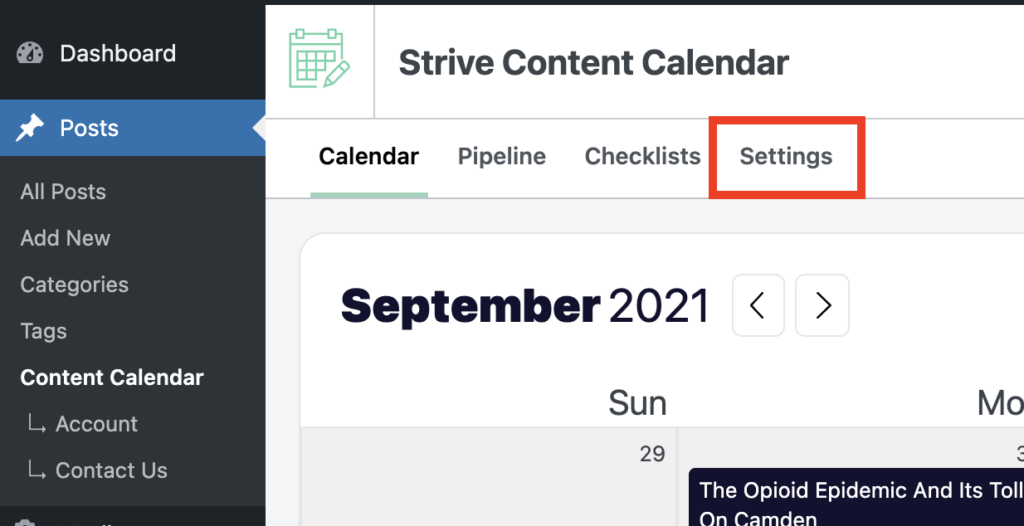
To display post categories in the calendar, start by visiting the Settings menu.
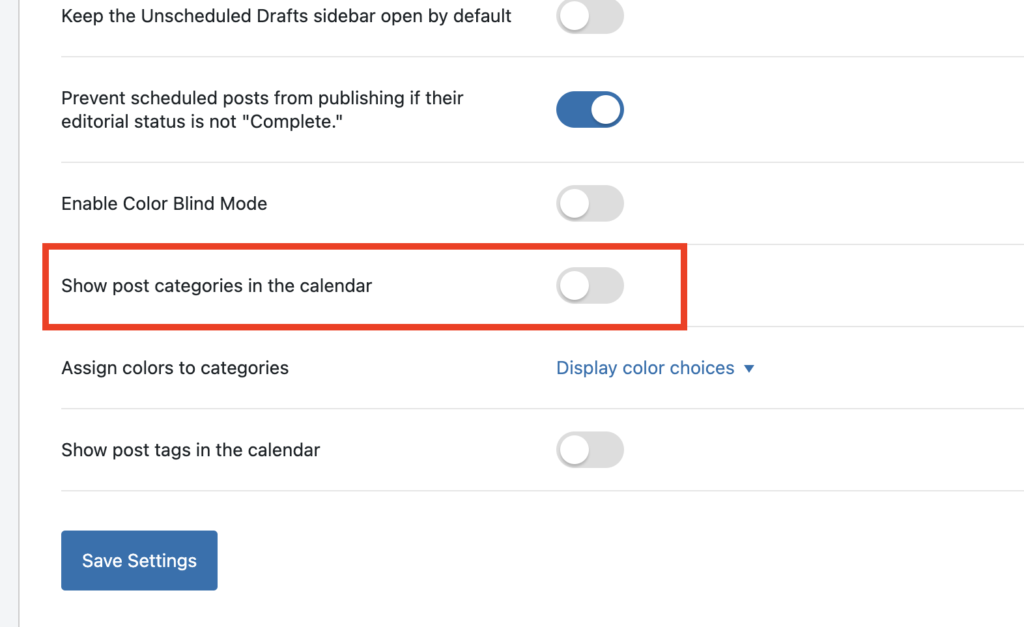
In the Settings page, locate the Show post categories in the calendar option, and click the toggle switch to enable the category display.
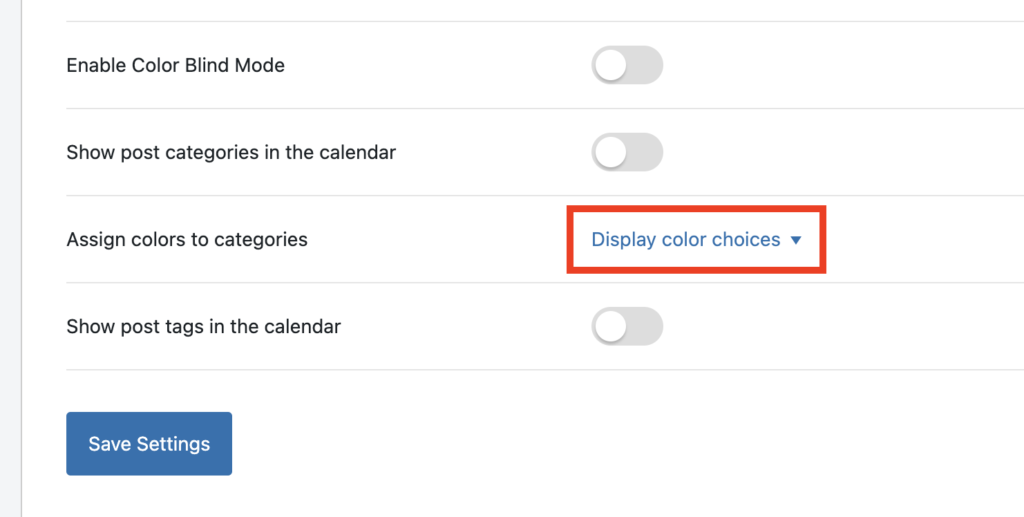
Next, click the Display colors choices link to reveal the category color options.
You’ll see all the top-level categories, each with a color picker beside it.
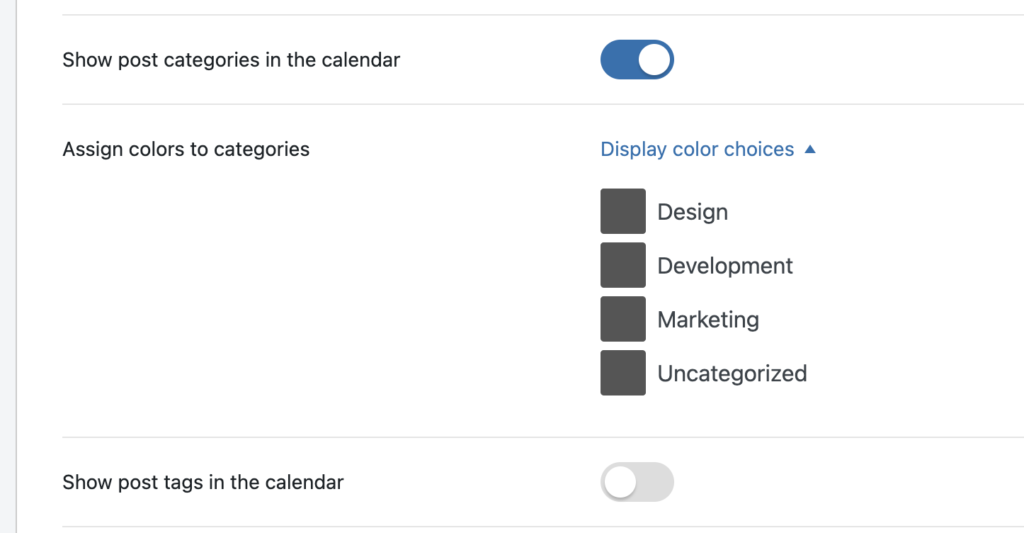
Sub-categories are hidden and use the same color as their parent category.
To change the color associated with a category, click on the gray color thumbnail to reveal the color picker. Then to customize the color, select one of the swatches, enter a hex code, or use the color slider.
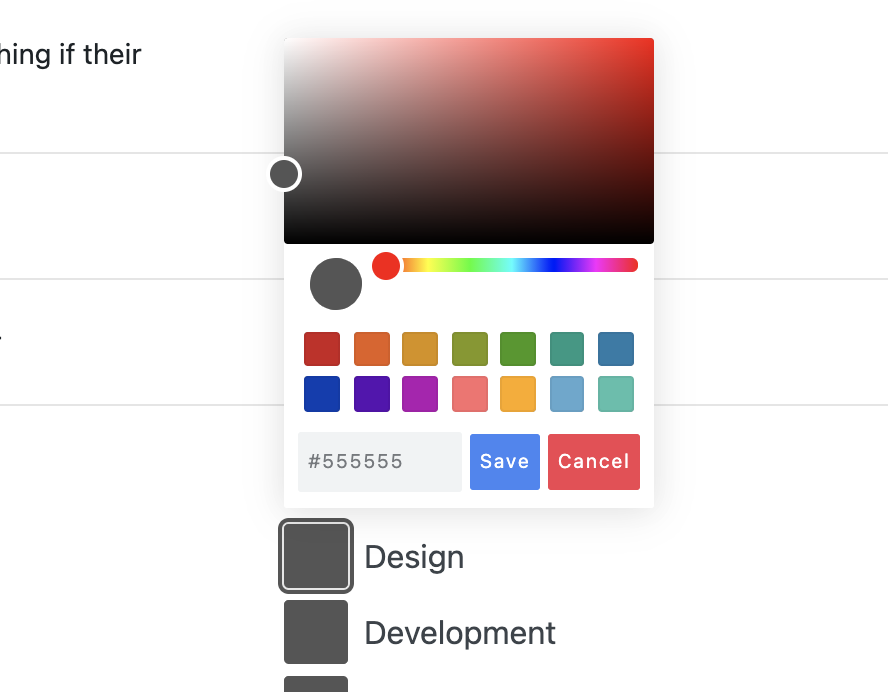
When you’re happy with the selected color, click the Save button in the color picker to save it.
Repeat this for each of your categories, and once you’re finished, click the Save Settings button at the bottom of the page.
When you return to the calendar, you’ll see the categories displaying above the post titles using the colors you’ve selected.
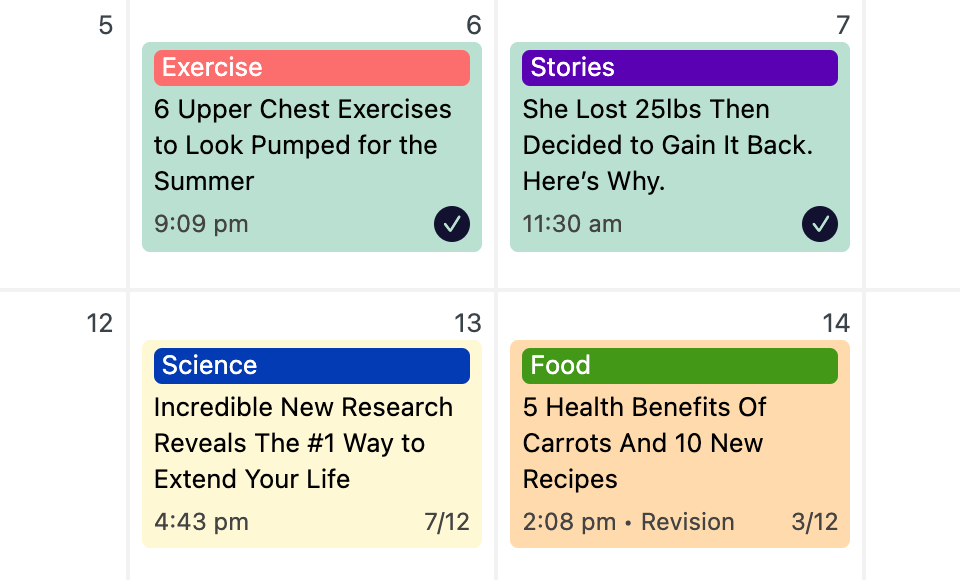
Please note that if a sub-category is used, the parent category is omitted. This is also true for sub-sub-categories. If a post has multiple top-level categories, they will all be displayed.
Search
Search for
Categories
Related Tutorials
- Getting Started with the Content Calendar
- How to Add New Posts to the Calendar
- How to Reschedule Posts
- How to Edit Posts in the Calendar
- How to Unschedule a Post
- How to Display Post Tags in the Calendar
- How to Filter Posts in the Calendar
- How to Prevent Incomplete Posts From Publishing
- How to Change the Starting Day of the Week
- How to Change the Number of Weeks in the Calendar
- How to Enable Color Blind Mode
- How to Translate Strive
- How to Keep the Unscheduled Drafts Sidebar Open